District adjustments have been enhanced in the Fees → PASS screen. The fees are no longer tied to the Disclosure Categories. The student will only see the amount they owe, not the original fee amount based on whether they qualify for Free or Reduced meal status. This change is propagated to the student’s Fee screen in SDMS and to the receipt.
New Fee Fields
Assigned Date
Fees now have an “Assigned Date” which allows you to record the original date the fee was assigned. If no date is entered, it will default to the current date. In a future release, support for the field will be added to the Fee importers.
End Year
The End Year associated with the fee is now displayed. For example, if a fee is associated with the 2016-17 school year, the End Year field will reflect 2017.
Viewing and Processing Fees in PASS
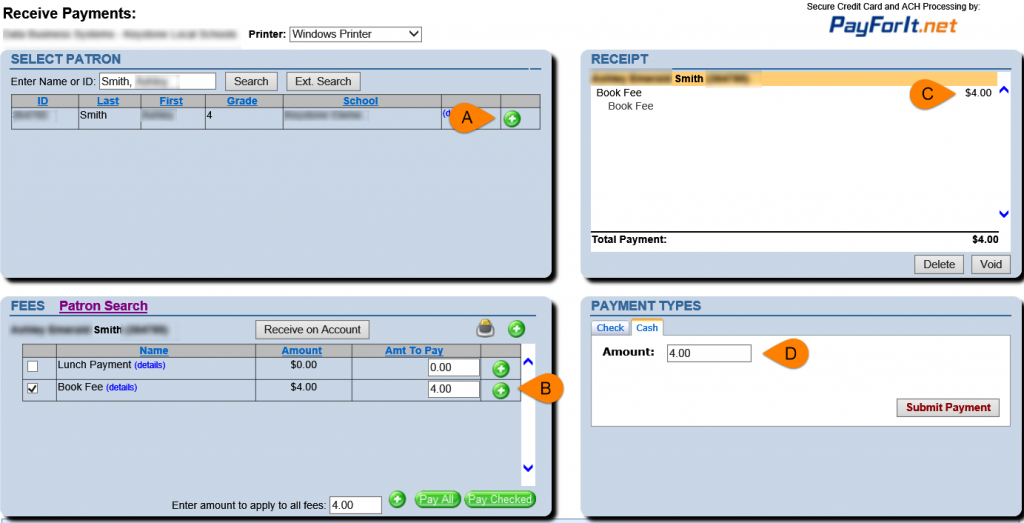
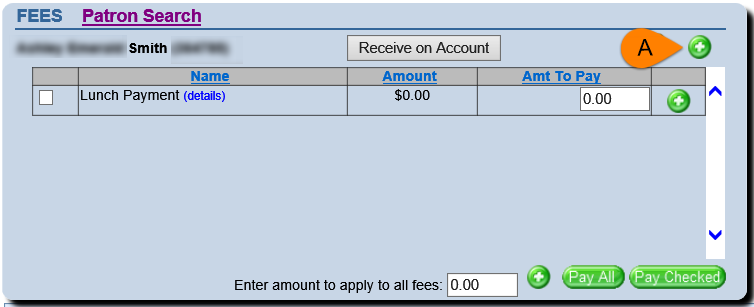
Under Fees → PASS, select a student by name or ID. Click on the green icon to populate the Fees window (A). In this example, an $8.00 fee has been reduced to $4.00 for the student.
Clicking on the green icon next to a fee in the Fees window (B) populates the Receipt window with that fee (C).
Enter a payment amount in the Payment Types window and click “Submit Payment” (D).
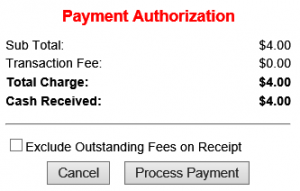
When a payment has been entered in the PASS screen, clicking “Submit Payment” brings up the following pop-up window.
The amount shown in the Payment Authorization window reflects the reduced amount the student is paying for the fee. In earlier releases, this screen displayed fee’s district adjustment.
Fee Receipt
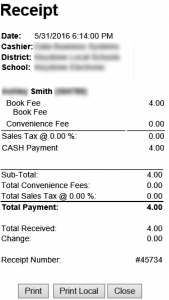
The Fee receipt displays only the reduced amount the student is paying. After viewing the Payment Authorization screen, click “Process Payment”. Note that the amount is the reduced amount the student saw on the PASS screen. As in the Payment Authorization screen, in the earlier releases, the district adjustment was reflected on the student’s receipt.
If the student has any outstanding fees, they will also be displayed at the reduced amount.
Note: “Allow Pop-Ups” must be enabled for the receipt to display in a new browser window.
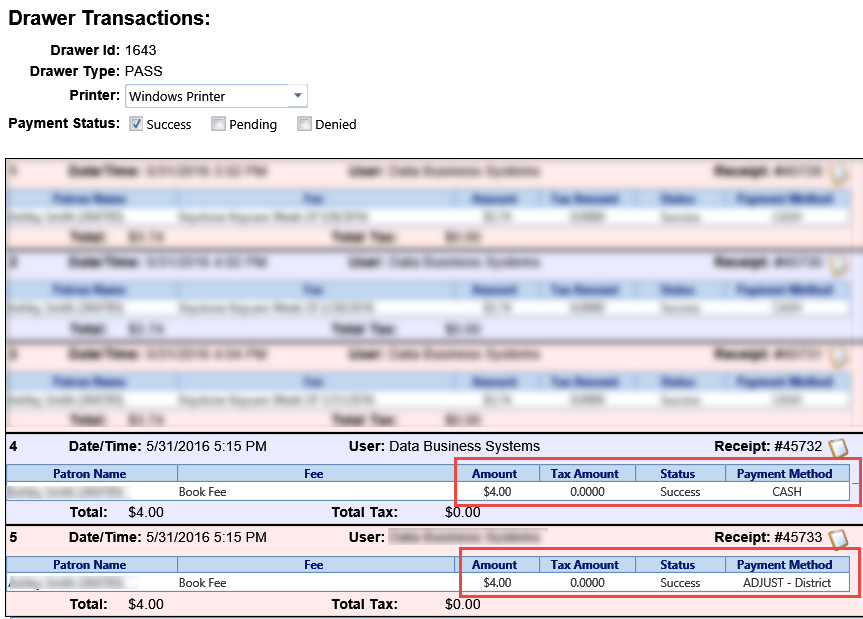
To view the original amount of the fee, click on Fees → Drawer Information → Details.
The Details screen displays the amount the student paid and the amount of the district adjustment. In a future release, this screen will be viewable by permission.
To assign a fee using the Ad hoc feature in PASS, click on the green icon in the upper right of the Fees window (A).
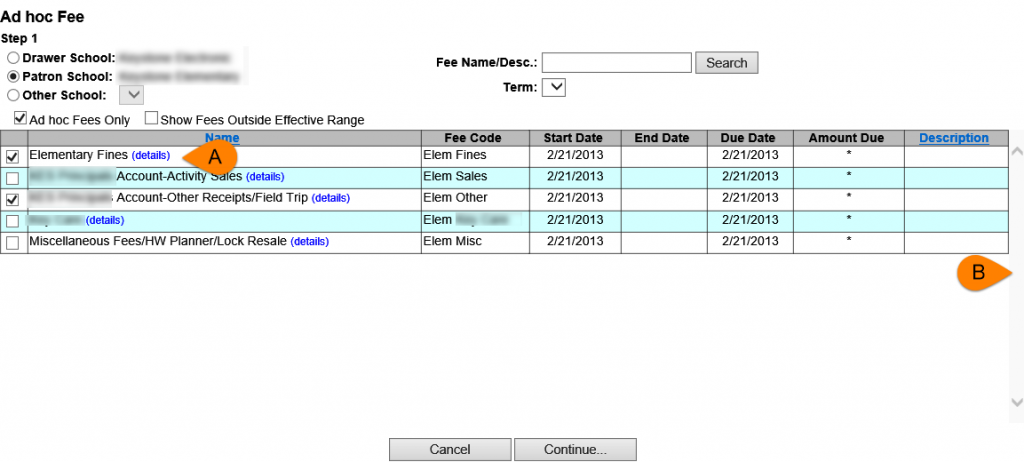
A new feature on the Ad hoc screen is the ability to select multiple fees and add them all at one time (A) and the ability to scroll through the fees instead of paging (B). If the fee you are adding is a duplicate, a new duplicate fee will be created or you can select one of the existing outstanding fees to use.
Click “Continue” when finished adding the desired fees. In this screen, you can edit the Assigned Date, the School Year the fee is associated with, and add any desired Fee Notes or Attributes (please contact Support to use the Notes and Attributes features). Some of the fields that appear on this screen may not be editable. If the fee is a reduced price fee, the amount cannot be changed. In this example, the fines and field trip fees are not reduced therefore the amount charged could be edited on this screen.
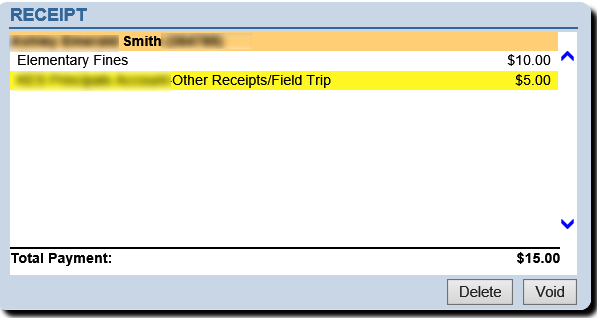
Click “Add to Receipt” when all data is correct. You will now see the two new fees in the Receipt window.
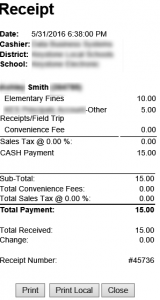
After entering the amount to be paid and clicking “Submit Payment” and “Process Payment” on the Payment Authorization pop-up window, the receipt will display the newly added fees. Note that the added fees were not subject to the automatic reduction due to the student’s Free or Reduced meal status.
With the 2016.6 release, a fee can appear as $0 when it is due to a student receiving a Free and/or Reduced price adjustment that drops the student’s portion of the fee to $0. When this is the case, the amount field is non-editable.
If the fee is truly a Zero Dollar, the cashier is required to add a dollar amount and change the initial $0 to something greater than zero.
For example, the fee called Elementary Fines in the screenshot for Ad hoc fees shows as a Zero Dollar amount. Fines vary for students and, in this example, the student was charged $10 for fines.
In the PASS screen, click and add the Zero Dollar fee to the receipt and in Payment Types, enter a Zero Dollar amount and click “Submit Payment”. The receipt will show “Paid in Full” and verifies that the transaction has been processed.

